Faceted Gems with Super Blade Pro 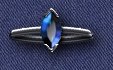
I've seen other faceted gem tutorials and they work pretty well for opaque gems but most faceted gems are not opaque. So I came up with this technique to show the faceting on the 'bottom' of the gem as well as the top.
You may want to download my vector shapes for common gem cuts (pear, marquis, trillium, and emerald). This is a PSP6 file, just open it and then go to File > Export > Shape to add them to PSP.
I have also created a dozen Super Blade Pro presets for gemstones.
Start with a new transparent image 500x500 pixels in size.
Set your foreground color to nothing and your background color to white.
Using the vector shapes tool draw a polygon of suitable shape for a gemstone. For round gems like the one in this tutorial use the dodecagon shape that comes with PSP. Make this polygon 200x200 pixels.
If your shape is on a vector layer convert it to raster.
Duplicate the layer. And while we're at it, add a blank layer to the top of the stack.
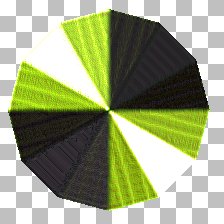
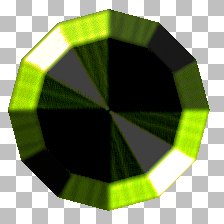
Turn off the top shape layer and make the bottom active. Select the shape and open Blade Pro.
Choose a nice glassy gem colored preset to create your gemstone. I'm using my peridot preset.
Select the bevel with straight sloped sides and a flat top (the top on on the drop down list). Make the radius 100. The height should be negative, generally about -40 works well. The key is to make the the reflections in the bottom of the gem look right.
Now go to the upper shape layer and make it active and visible. Apply the same preset with a medium bevel (around 25) and positive height less than the bevel width (about 15).
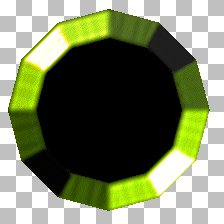
Now to get the gem like qualities. Set the bottom layer transparency to about 25%. This amount depends on the color of your gem and how clear you want to make the gem.
Set the top gem layer blend mode to Overlay.
It's still not quite right so we'll add some glare to the table of the gemstone.
Go to the top blank layer. You should still have an active selection, if not go back to one of the gem layers and select around the gem, invert the selection, and go back to the top layer.
Contract the selection by the same amount as your bevel for the top of the gem plus 1 (25 + 1 = 26 pixels in this case).
Set your fill style to gradient, fading foreground, angle 315 (whatever puts the clear part of the gradient in the same direction as your preset's light source).
Flood fill the selection with the gradient. Deselect everything and apply a small Gaussian blur of 1.
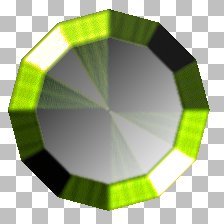
Now just merge the visible layers.
 Since
we wanted a round gem we have to knock the corners off now. Use the selection
tool set to circle with the antialiased checked to select nearly the entire
gem. We just want to make it round, not smaller. Invert the selection and
hit the delete key.
Since
we wanted a round gem we have to knock the corners off now. Use the selection
tool set to circle with the antialiased checked to select nearly the entire
gem. We just want to make it round, not smaller. Invert the selection and
hit the delete key.
Resize the gem to your taste. I resized this one down to 25% and applied the sharpen filter once.
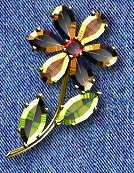
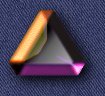
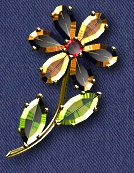 The
flower brooches on this page were made the same way as this sample round
gem. The topaz petals were done originally as peridots, then the hue and
saturation were adjusted (hue to 35 and saturation to 25).
The
flower brooches on this page were made the same way as this sample round
gem. The topaz petals were done originally as peridots, then the hue and
saturation were adjusted (hue to 35 and saturation to 25).
 Back
Back

©2004 Lynn A. Davis