|

This is my take
on making glassware, instead of using a gradient fill I'm going to
use a waterdrop I made in KPT. I have included two sizes of waterdrop
in PSP files for download. To make larger
goblet bowls it's better to start with the larger waterdrop. Both
files are usable by PSP versions 5 and up.
Open waterdrop.psp
and copy the transparent layer. Paste it to make a new image. We'll
work on this copy. (This will yield a snifter the size of the one
on this page, if you know you will want a larger snifter use bigwaterdrop.psp
for this step.)
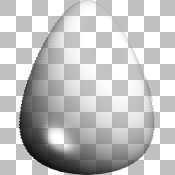
Apply a horizontal
cylinder deformation with a strength of 25.
Apply a vertical
perspective deformation with a setting of -60.
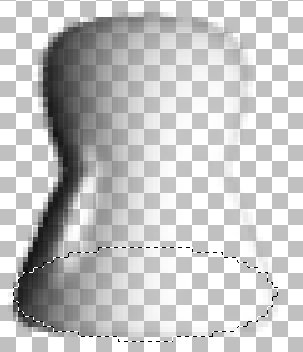
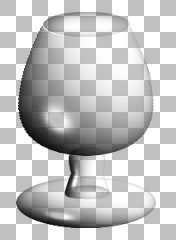
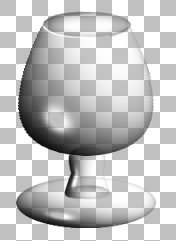
You should now have
something that rather like those glass ornament eggs they sell in
craft stores.
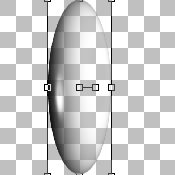
Set the selection
tool to ellipse and make sure antialias is checked.
Draw an ellipse
starting at the center point (87,43) and drawing it out so the first
coordinate pair in the status line is (44,31).
Apply the Cutout
filter to the ellipse, making sure the 'fill interior' box is unchecked
and the shadow color is black. Set the vertical offset to 2, the horizontal
to 5, the blur to 15, and the opacity to 50%.
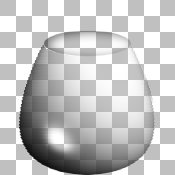
Expand the selection
by one, invert it, and then erase the extra waterdrop above the ellipse.
Deselect the ellipse. You now have an image that looks like this:
Now, for a stem
and foot.
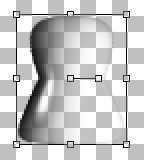
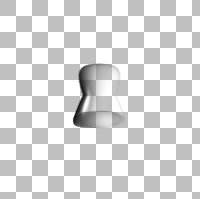
Make another copy
of the transparent layer in waterdrop.psp and paste it as a new image.
Click on the deformation tool and compress the waterdrop like this:
That's it for the
foot of the snifter, save it as a .psp file to save a step in making
more glassware.
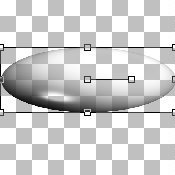
Paste the waterdrop
into another image and rotate it 45° to the right. Deform it like
this:
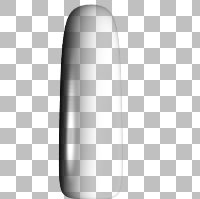
Increase the canvas
size to 200x200 with both boxes checked so the image stays centered.
Flip the image and apply a horizontal cylinder deformation with a
strength of 99. You should end up with a shape like this:
This is of course
much to long for a brandy snifter and not the classic shape either.
I'll save a .psp file of it for future goblets before I deform it
further however.
Double click on
the selection tool, you'll get a dialog window. Set the selection
to left=0, right=200, top=0, bottom=100.
Promote the selection
to a layer, move back to the bottom layer and hit delete. Now the
top of your stem is on the top layer and the bottom on the bottom
layer.
Select the deform
tool, hold down the Ctrl key and drag the upper corner in to narrow
the top of the bottom half of the stem. In PSP5&6 switch to another
tool to bring up the confirm deformation box and click 'yes'.
Switch to the top
layer and select the deform tool again. Holding down the Ctrl key
grab the bottom corner and drag it in so the top of the stem matches
the bottom like this:
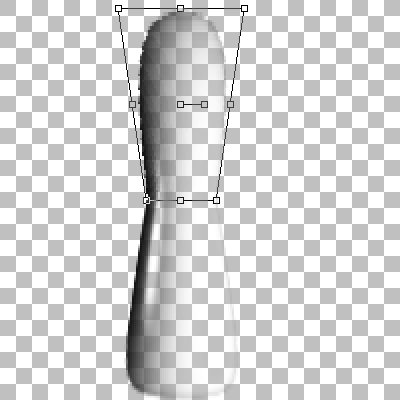
Approve the deformation
(PSP5&6). Merge the visible layers. Select the deform tool and
drag the top center handle down to deform the stem like this:
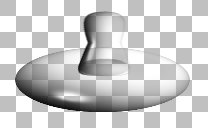
Now we need to add
some depth to the bottom of this stem.
With the selection
tool set to ellipse and and the antialias box checked make an ellipse
at the bottom of the stem like this:
Make another layer
and apply a cutout with the same settings as before. Move this layer
under the stem layer and then merge visible layers to finish the stem.
Now to put it all
together. As you probably noticed the bowl is too small for the size
of the foot and stem. Since the bowl has been deformed so often it's
better to reduce the size of the foot and stem.
Create a new image
500x500 pixels with a transparent background. Copy the foot image
and paste it near the bottom of the image near the center. Add another
layer and paste in the stem, place it centered on the foot from right
to left but slightly above the center from top to bottom like this:
Add another layer
and paste in the bowl of the snifter. Center it over the foot and
stem and overlapping the top of the stem a bit.
It doesn't look
too bad but the stem and foot are a bit oversized.
Go to the layer
with the foot of the snifter and resize it to 80% of the original,
make sure the resize all layers box is unchecked. If that doesn't
make it a size you like undo it and try another percentage to make
it smaller or larger. Once you have the foot the right size resize
the stem the same way.
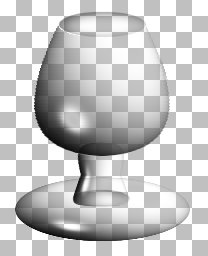
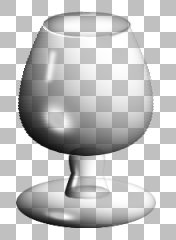
Readjust the placement
of the parts and you're basically done.
It still needs some
finishing touches. On a new layer above the others add some rim definition
with a highlight and shadow. Use the line tool set to bezier, width
1, antialias, color white to trace the rim of the snifter on the forward
left curve. Use a medium grey color (lightness 96) to trace the back
left curve and the right front curve of the rim.
Add another layer
and set your line tool to single line, width 5 and add a highlight
on the side of the snifter near the rim. Apply a gausian blur of 2.
The only problem
left is that the highlights in the bottom of the bowl and the stem
and foot are from a lack of colored pixels rather than from white
pixels. Using a very soft brush set to a very light opacity brush
these in carefully. If it still seems too sharp use the retouch tool
set to soften and full intensity to blur them.
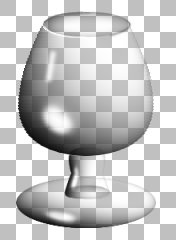
And there you have
it, a brandy snifter. Merge visible layers and make a tube out of
it if you like, but I find it easier to fill the snifter if you keep
it in three parts.
©2000
Lynn A. Davis
|