Easy Patterned Beads

This tutorial was written for PSP8 but I include notes for PSP7 as well. With PSP8 no plugin filters are needed. PSP7 requires Simple Filters' Left Right Wrap or Teph's Tricks Slide X 50%. Optionally PSP7 users could use a plugin Spherize filter but the effect can by duplicated with the built in Warp filter.
 Download
this Karl Bang image or use a seamless image of your choice, it should be square
or nearly square for the purpose of this tutorial. Images with good contrast
work best since they will be sized down to 50x50 pixels in the end.
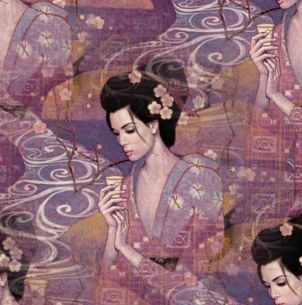
Download
this Karl Bang image or use a seamless image of your choice, it should be square
or nearly square for the purpose of this tutorial. Images with good contrast
work best since they will be sized down to 50x50 pixels in the end.
Open your fill image and duplicate it. Close the original.
Resize the copy to 300x300 pixels.
Duplicate your copy and go to Effects > Image Effects > Offset and set the horizontal offset to half the image (150), the vertical to 0, and make sure the edge mode is 'wrap'. Apply. [PSP7: Apply Slide X 50% or Left Right Wrap.]
Do the rest of the steps to both images. {Hint: When applying a filter/effect apply it to one image then go to the other and press ctrl-y to repeat it with the same settings.}
Go to Effects> Geometric> Spherize and apply with a strength of 100. [PSP7: skip this step]
Using the Selection tool with anti-alias turned on to select a circle from 150:150 to 0:0 (the circle will just touch the edges of the image).
[PSP7: Apply Effects > Geometric > Warp with the center offsets set to 0, the size to 100, and the strength to 20.]
Apply Effects> Illumination Effects> Sunburst with the brightness set to 50, the horizontal and vertical both to 30 and everything else to 0.
Add a new raster layer.
Apply Effects > 3D Effects > Cutout with the offsets set to -30 and the blur and opacity both to 100.
Adjust the layer blend mode/color of the cutout to the effect you like. (I'm using #492F47 rather than black, Multiply, with an opacity of 100.)
Merge the visible layers.
Crop to the selection.
Resize to 50x50 pixels.
Optionally, run Sharpen on the images.
Open a new image 100x50 pixels and paste your two beads into it. Export it as a picture tube. I generally make the placement 'continuous', the step 50, and leave the selection to 'random' for this type of bead.
You can use non-square, non-seamless images as well by making a bunch of new images from square selections that overlap. Of course you can make your beads any size you want as well, just adjust the cutout settings to make it look properly round.
PSP8 users can automate making beads as long as the starting image is always the same size (the script recorder records the size of the selection so the image you apply the script to must always be the same as the one you recorded the script on).
Back
©2003 Lynn. A. Davis