Drilled Glass Beads

I got tired of the unrealistic transparent glass beads that I was making so I decided to come up with a way to add the effect of the drilled hole to them. The result will have to be made into an angular placement tube in order to make strands but that isn't difficult, just a bit tedious.
This tutorial was inspired by the Plastic Button and Aqua Capsule tutorials.
You will need to download and install my Alpha Black filter if you haven't already.
Open a new image with a transparent background and at least 100x100 pixels large.
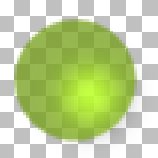
Set your foreground color to HTML color code #749E18 (this is your bead color, you can change it later).
Use the shapes tool to draw a circle in the center of the image (hold down the shift key to force the elipse to be a circle). If the layer is vector, convert to raster.
Press Ctrl-a to select the entire image then use the magic wand tool and click on the circle to float it. Go to Selections > Save to Alpha Channel and save the selection as 'aliased'.
Change the layer opacity to 50% and name it 'bead back'. Duplicate the layer and name the new layer 'bead front'.
Use the magic wand tool to select the area around the circle. Go to Selections > Invert then to Selections > Save to Alpha Channel and save it as 'sharp'.
Add a new layer and call it 'glow'.
If your 'sharp' selection is not loaded, go to Selections > Load from Alpha Channel and select it. Go to Selections > Modify > Contract and contract by 10 pixels.
Flood the selection with white. Click on it with your magic wand tool to float it. Hold down the shift key and press the right arrow key 5 times. Still holding down the shift key press the down arrow 5 times. Release the shift key.
Go to Effects > Blur > Gaussian Blur and set the radius to 5.
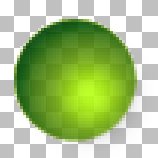
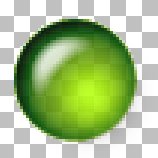
Set the glow layer's blend mode to 'dodge' and the opacity to 50%. You should have something like this (image is zoomed in):
Add a new layer, call it 'shading'. Go to Selections > Load from Alpha Channel and select your 'sharp' selection.
Go to Effects > 3D Effects > Cut out and set the offsets to 5, the blur to 35, the opacity to 100, and the shadow to black. Leave the 'fill interior with color' box unchecked.
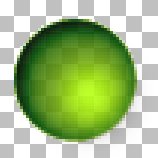
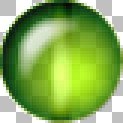
In the Layer Palette set the blend mode for the shading layer to 'burn' and the opacity to 75%. You should have something like this:
Add a new layer and name it 'edge'. You should still have your 'sharp' selection loaded. Flood fill it with black.
Go to Selections > Modify > Contract and contract by 4 pixels. Then go to Selections > Modify > Feather and feather by 6 pixels. Hit the Delete key.
Set the layer opacity to 30% and the mode to 'burn'. The image now looks like this:
Add a new layer and call it 'highlight'. Load your 'sharp' selection. Contract it by 6 pixels.
Fill the selection with white. Use the magic wand tool to click on the selection and float it.
Hold down the shift AND ctrl keys and press the up arrow once and the left arrow once. Press the 'F' key to defloat the selection. Release the shift and ctrl keys.
Press the delete key to remove the white from the selection.
Go to the Bead Back layer. Hold down the ctrl key and click on the circle with the magic wand tool. You should now have a cresent shaped selection.
Go back to the highlight layer. Fill the selection with white again. Click on it with the magic wand to float it again. Hold down shift+ctrl and press the down and right arrows once each and then the 'F' key to defloat the selection.
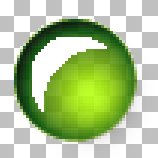
Go to Effects > Blur > Gaussian Blur and set the radius to 3 pixels.
If you like the soft, somewhat matte look to the bead you can skip to the drilling part. We're going to polish the bead now.
Go to to Effects > Plug-in Filters > Teph's Tricks > Alpha Black.
Go to Colors > Adjust > Levels and set the three numbers to 100, 1.00, and 200.
Go to Masks > New > From Image and use the source luminance. Leave the invert mask data box unchecked.
Use the magic wand tool to select the transparent (black) area of the mask. Press the delete key to clear it.
Go to Selections > Invert and use the delete key again to clear the selected area. Go to Selections > Save to Alpha Channel and save it as 'highlight'.
Set your foreground and background colors to white. Set the foreground style to gradient and choose 'fading foreground'. Flood the selection.
Now to drill the beads.
On the 'glow' layer load the 'sharp' selection. Go to Selections > Invert and then press the delete key to cut off the excess glow. Invert the selection again and go to Image > Crop to Selection to crop the image to just the bead.
Go to the 'back bead' layer and switch to the line tool. Make sure 'create as vector' is checked and draw a white line, 6 pixels wide, straight down the center of the bead.
Name the vector layer '0' then duplicate it, name the duplicate '10' and go to Image > Rotate. Make sure 'all layers' is unchecked and rotate the layer right 10 degrees.
Convert the '0' layer to raster.
Duplicate the '10' layer, convert the original '10' to raster.
Rotate the duplicate by 10 degrees and name it '20'.
Repeat until you have 18 line layers (named 0 to 170), each with a different angled line. (We need this many to make the angular placement tube.)
On the '0' layer apply Effects > 3D Effects > Cutout with these settings:
- both offsets = -1
- opacity = 80
- blur = 6
- shadow = black
- interior = white
- fill interior = checked
Go to the '10' layer and press ctrl-y to repeat the cutout. Repeat for all other line layers.
Set all line layers to an opacity of 50%.
Go to Selections > Load from Alpha Channel and choose the 'alias' selection. Invert the selection. On every line layer press the delete key. This aliases the ends of the drilled area with the edge of the bead.
Save this image as a PSP file. It's simple to change the color of the beads and it saves a lot of work.
Now we need to make the tube. If you want to change the color or opacity of the beads now is the time. Change the color by changing the color of the circles on the 'bead back' and 'bead front' layers. Adjust the glow and shading layers to suit your new color and then continue with the tutorial.
Go to Windows > Duplicate to make a copy of your image. Close the original. Now make 17 other copies. (If you don't have enough RAM make one copy at a time.)
Turn on only one line layer in each copy (so one has line '0', one has '10', one has '20', etc.)
Go to Layers > Merge > Merge Visible for each image.
Check your image dimensions. Mine are 41x41 pixels. Multiply the width and height by 6. Open a new image this size (mine will be 246 x 246 pixels).
Go to View > Grid and then View > Change Grid and Guide Properties. Set the grid spacing to the size of your bead images (41 and 41 for my beads).
Go to your '0' line bead image. Copy it and paste it into your new image as a new selection (ctrl-e). Place it in the upper left corner precisely inside the grid lines. Save the new image as a PSP file and you can close the '0' bead image.
Place the '10' bead to the right of the '0' bead, then the '20' and so on. Always work left to right, just like writing.
When all 18 beads are set in the top half of the image just copy the whole image and paste it as a new selection. Arrange it in the bottom half of the image and your tube file is ready to be exported.

Go to File > Export > Picture Tube. There are 6 cells across and 6 cells down. The placement mode should be 'continuous' and the selection mode should be 'angular'.
Step is somewhat a matter of taste, if you like your strands tight make it two pixels smaller than the cell size (39 with my tube), if you like the strands looser or plan to knot between them make the step larger. If you're making a tin cup necklace the step should be larger still.
Now test your tube, both on light and dark colors. If you notice light or dark 'jaggies' around your beads there's a simple (though not terribly quick) way to fix them:
- Open your tube file
- Using the selection tool set to 'circle' with antialias checked select your first bead by dragging from the center to almost the edge. The marching ants should be just one pixel inside your bead.
- If the selection is the right size but not centered switch to the mover tool, hold down the shift key, then right click and drag the selection to the center of the bead.
- Copy and paste as a new image. This tells you how big your 'new' beads will be.
- Open a new image 6 times the width and height of your new bead. You're going to make a new tube so set your gridlines as needed.
- Paste into this new image and place your first bead. You can close the single bead image, you won't need it.
- Go to your old tube image, hold down shift as you use the right mouse button to drag the selection with the mover tool to the next bead.
- Copy and paste it into the new tube image in the proper location.
- Continue until the first three rows of the tube are complete.
- Copy the entire new tube image and paste it into the lower half to complete the tube.
- Export the tube and test it.