Embellished Beads

After making a bunch of plain glass beads I decided to try decorating them. This tutorial covers adding etched designs, onlays (raised designs), and metal inlays to beads.
For the most complete knowledge of the technique I've decided to present this tutorial using an angular placement tube. Beads that have no 'right side up' are much quicker to work with of course.
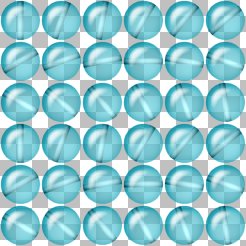
Go to your tubes folder and open the bead tube you want to decorate. Go to Window > Duplicate and then close the original tube file. I'm using one of my drilled bead tubes.
Switch to the text tool and click on your image.
Make sure 'create as vector' and 'antialias' are checked. Set the fill color to white and click the 'standard text' button.
Set your font to 'Wingdings' and the font size to '20'.
Type a backslash ("\" character) to get the symbol for 'om' and click OK.
Place your om in the center of the first bead of your tube.

Switch to the vector tool and right click on the om. Choose 'convert text to curve' and 'as single shape'. This changes the look of the character slightly but it also insures that if you have to open the psp file on a comupter without the font installed it will still work.
Select your om and copy it. Paste it as a new image.
Rotate your om image 10 degrees to the right. Copy it.
Paste the rotated om into your bead tube as a vector selection (ctrl-g) and center it on the second bead.
Go back to the om image, rotate it 10 degrees again. Copy and paste into the bead tube and place it on the next bead.
Continue rotating and pasting until you have an om on every bead.
Save the image as a PSP file to preserve the layers. Duplicate the image three times and close the original.
Do one of the following effects on each duplicate:
Etched Designs
Make sure your background color is white.
Use the vector tool to select all your oms.
Right click and select 'Properties'.
Change the fill to gradient and select 'Fading Background'. Check the 'invert gradient' box and set the angle to '135' (or whatever angle is necessary to put the most opaque area opposite the light source on you bead). Click OK.
Convert the vector om layer to raster.
Under View turn on the Grid. It should still be set to the spacing you used to make your tube if you use PSP7, if not set the grid so each cell is the size of your tube cells.
Double click your selection tool. You'll get a dialog box.
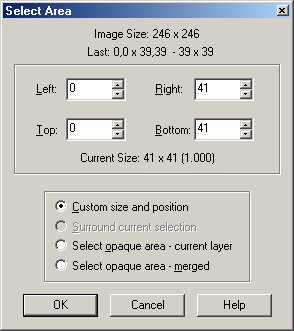
Make sure the top and left numbers are 0 and that the right and bottom numbers are the size of the tube cell. Click OK.
Go to Effects > Geometric Effects > Punch and set the %Effect to 25. Click OK.
Switch to the mover tool. Hold down shift then right click and drag the selection to the next bead. Press ctrl-y to repeat the punch effect on this bead.
Repeat until all beads have been Punched.
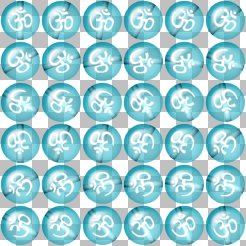
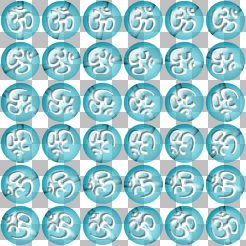
It should now look like there is a frosted design on your beads. Adjust the opacity of the om layer to your taste.
Onlay Designs
Convert your vector om layer to raster.
Go to Effects > 3D Effects > Drop Shadow and set both offsets to -1, the opacity to 50, the blur to 1, and the color to black or a dark shade of your bead color. Click OK.
Select each bead and apply Punch as you did for the etched designs.
You can leave the design looking slightly worn or you can apply Effects > Sharpen > Sharpen to make the beads look newer.
Try different layer blend modes to change the look of your onlays (I suggest Luminance). Consider using colors other than white for the designs.
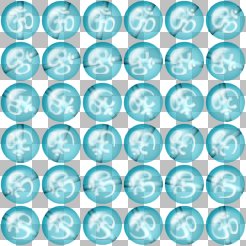
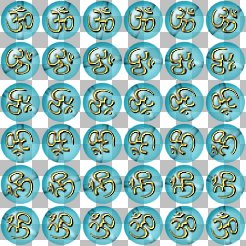
Inlay Designs
Convert the vector om layer to raster.
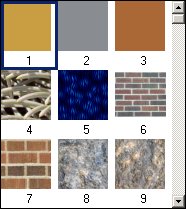
Apply Effects > Texture Effects > Sculpture with the following settings:
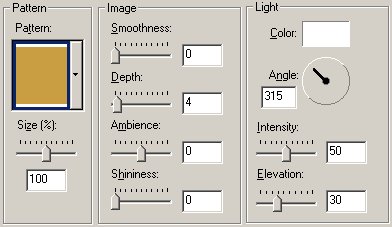
You can get silver and copper effects by using '2' or '3' rather than '1'.
You could also use Blade Pro but you would have to select all your oms first.
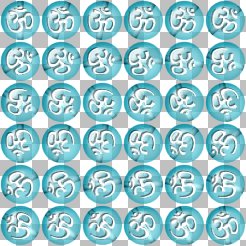
Now apply a drop shadow with the same settings as you used for the onlay design. (Notice that the shadow is on the same side of the bead and inlay design as the highlights. This is what makes the design seem to be laid into the bead.)
Now punch all the beads as you did for the other effects (this is what makes the designs seem to be curved on the surface of the bead rather than flat planes.)
Apply Effects > Sharpen > Sharpen to polish your metal inlay since the Punch makes it a bit dull.
Making the Tubes
Go to each of your decorated bead images and do Layers > Merge Visible.
Export the tubes. Remember to set the placement mode to 'continuous' and the selection mode to 'angular'.